Everyone likes a neat and clean appearance. The good news is that it doesn’t take much effort to get that classic look. All you need is a good razor. There are different types of razors flooding the market. We’ll help you pick the right one.
Use in the stone age, the first known version of a razor was a shaving stone which was essentially a flaked obsidian.
The Egyptians used a rotary razor.
Shaving was adopted by Alexander’s troops. The Romans replaced the circular razor with a straight one.
Straight razor was most commonly used till the 20th century. This razor had a stainless steel blade that is sharpened on one side.
Next came the shavette, had a disposable blade. It is easy to use but less durable.
In 1880 came the first marketed safety razor. Safer to use than straight razor but required practice.
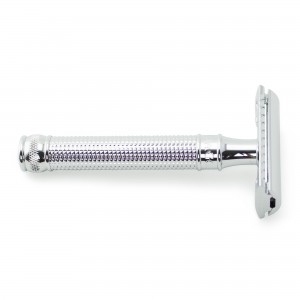
1903 saw King Gillette sell the first double edge safety razor which had edges and protective bars on both sides of the blade.
First disposable safety razor came in 1960. The entire razor is discarded after use over a period of time.
Then came the cartridge razor with disposable blades. whose head remained bent at a slight angle for a closer shave.
The foil electric razor run on batteries or can be recharged. For this, no shaving gel or foam is needed. Since the blades move back and forth, they don’t work well on facial curves.
Based on the same principle as the electric razor, the rotary electric razor has blades that rotate on the head. They are easy to use and work well on facial contours with minimum effect.
If you are interested in learning more, check out the infographic below.
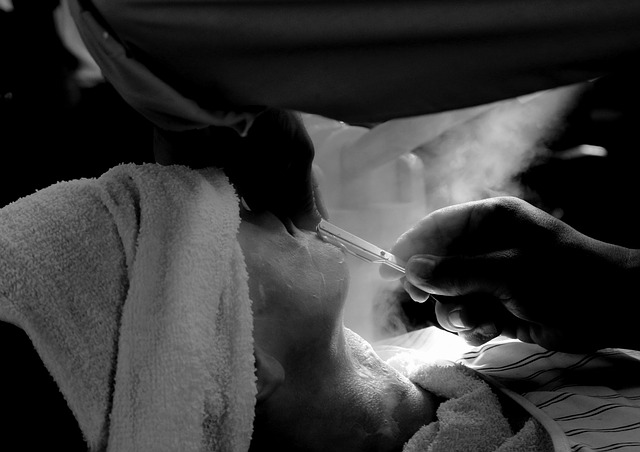
So you have your safety razor in hand and now just keep looking down at it wondering how to shave. It sounds like a silly question, but using a safety razor for a wet shave is not the same as using a cartridge razor. We’re here to help. Below is a quick seven-step guide to how to shave using your new safety razor. Just gear up and go!
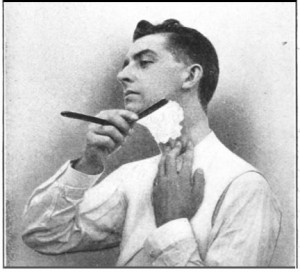
Shaving with a straight razor
1. Determine your hair growth direction.
Before starting your perfect wet shave routine, you need to reacquaint yourself with your hair growth. Hair growth is the road map of how to shave. Let your beard grow for a few days, until you have visible stubs and can see which direction the growth on each area of your face occurs.
When you start wet shaving, you will want to shave in the direction of your hair’s growth to avoid nicks and cuts. As you become acclimated to your new routine, you can give shaving against the grain a try. Just don’t do that right out of the gate.
2. Cleanse and exfoliate your skin.
Using a quality skin cleanser that exfoliates, such as a facial scrub, spend some time in the shower or at the sink focusing on a good exfoliation to lift facial hair and remove dead skin. This will help you experience a smooth, comfortable shave and less ingrown hairs, particularly as you relearn how to shave using your new safety razor.
3. Steam your face in the shower or with a hot towel.
In a warm shower or using a hot towel, apply steam or warmth to your face for about half a minute. This warmth softens your hairs, making them more responsive to the razor’s blades.
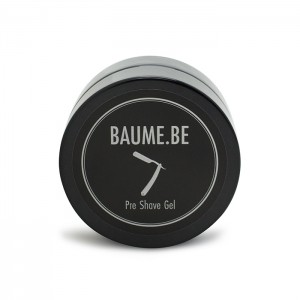
BAUME.BE Pre Shave Gel
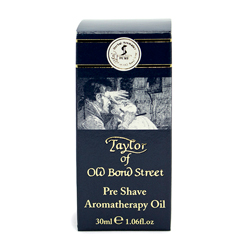
4. Apply pre-shave oil.
To further prep your skin and soften hairs, apply a quality pre-shave oil, gel or lotion. Pre-shave oil helps protect the skin’s surface by encouraging the razor to glide over its surface. Pre-shave oil also moisturizes your skin and improves how it looks between shaves.
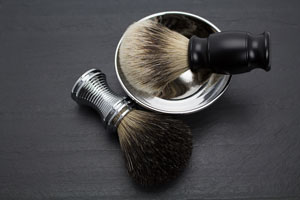
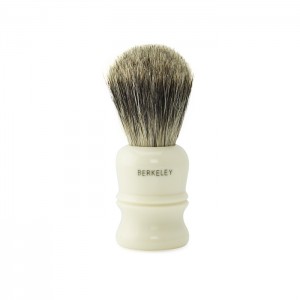
5. Use a badger shaving brush to apply shaving soap or shaving cream to your face and neck.
Using a badger hair shaving brush helps evenly apply your shaving soap or shaving cream. It also lifts facial hair so it is “in place” for optimum cutting by the razor. Before shaving, let the shaving soap or cream remain on your face for about half a minute, to work its magic.
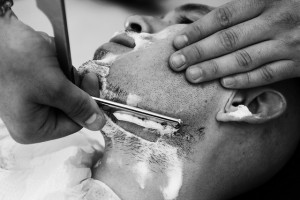
Shave in the direction of hair growth, starting on the sides of the face and progressing to the neck, jawline and finally the mouth area while using short strokes. Do not apply pressure to the razor or press it into your skin. Simply hold the razor firmly at a 30-degree angle. Remember to go slowly and stretch your skin with your free hand where needed.
6. Cold water splash.
To rinse your face, use a cold water splash or a cold wet washcloth. This will close your pores and ready your skin for after shave application.
7. Application of after shave.
Lightly apply after shave lotion, balm or cream to your shaved areas. After shave hydrates the skin and provides anti-bacterial protection to minimize bumps and irritation.
Getting a “classic shave” means stepping away from your quickly executed, disposable razor-quality shave using canned shaving cream. A classic shave is an experience and daily ritual men of many generations have enjoyed. You can enjoy your shave, too. The keys to that lie in having the right implements and knowing how to execute a luxurious shaving experience from start to finish.
What You Will Need for a Classic Shave
For a truly timeless shave, you will need several items:
Once you have these items on hand, fill a sink full of hot water. Ensure it is not scalding, but nicely hot and steamy. The best time to shave is after you have had a hot shower.
While you are filling the sink, allow your shaving brush to soak in the water.
Prepping Your Skin
Berkeley 46 Pure Badger
Splash enough hot water on your freshly showered face to keep it very wet. It is important to ensure your face stays well hydrated and warm throughout the shave.
Take your shaving brush out of the hot water and hold it upside down until all of the excess water has flowed out. Swirl the warm, wet-tipped brush on the surface of the shaving cream in circular motions. Do this until white lather appears. You will need sufficient shaving cream, but not too much. When you have done a few classic shaves, you will know how much cream is right for your shave.
Paint the lather onto your face using an up and down motion. Ensure all of the areas you will be shaving are covered with cream. The layer of shaving cream should be thick and opaque. Put down your shaving brush and replace it in your hand with the razor.
Executing Your Classic Shave
Edwin Jagger 3D Laser Diamond DE3D14BL
Shave in the direction of hair growth. That means you shave with your whiskers, not against them. If you are using a safety razor for the first time, you must remember that safety razors require slow, light-handed application. Do not stroke it heavily across your skin in rapid movements, like you do with a disposable razor. Part of the experience of the classic shave is in appreciating the slow, relaxing movements.
You will need to pay attention to your hair’s growth pattern while shaving to avoid cuts and razor burn. Unlike with a disposable razor, a safety razor requires greater care and attention to the growth patterns. Also remember to rinse your safety razor frequently, between each pass if needed. Your whiskers may require two passes over each area, to ensure a close shave.
After the Shave
Once your shave is complete, rinse your face with cold water. Using cold water closes your facial pores. Pat your face dry with a towel.
Rinse your razor and shaving brush very well to ensure all lather and residue are removed. Shake the shaving brush dry and store it using a shaving brush drip stand. Never store your delicate shaving brush on its side. Bristles need to air dry and this is done by hanging the brush from the drip stand. Properly maintained, your shaving brush can last more than 20 years.
Aftershave Lotion for a perfect classic shave
Finish your classic shave with a non-alcohol after-shave lotion or moisturizer. Moisturizer meant for after your shave will not sting and bring tears to your eyes like traditional after-shave made with alcohol. Follow the methods of wet shaving with the appropriate products listed and you are guaranteed to have a perfect classic shave.
How Shaving With The Grain Just Might Work For You
Many men try to shave against the grain to gain their closest shave. Even though this method cuts the hair as close to the skin as possible, it also causes problems for the skin. Razor bumps, skin irritation and even cuts can result.
About Shaving Against the Grain
Shaving against the grain causes the razor to pull at the hair before cutting it. That is why going against growth pattern produces such a close shave. But this tugging can damage hair and skin. It causes those ingrown hairs and razor bumps, resulting in swelling and redness on your face that you can probably happily live without.
Many men have skin that does fine with shaving against the growth pattern. But others suffer from it and have to make the choice between a really close shave today with those red bumps tomorrow, or shaving with growth as nature and invention intended.
If you are not an adrenaline junkie and want to focus on shaving with the grain, don’t fret. You can still get a very close shave through this method. The trick is just in knowing how.
Shaving with the Grain: How to Get Your Closest Shave
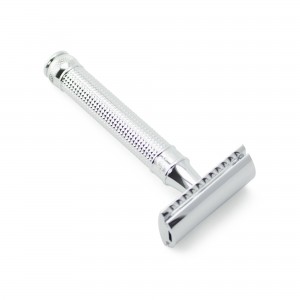
To get your best shave with the grain, you will first need to obtain a double-edged safety razor. There are a multitude of these to choose from at The Original Shave Company. It is just a matter of choosing the right one for your grip and style.
Edwin Jagger DE3D14BL
Safety razors are not dragged across skin. Unlike disposable razors from the grocery store, these razors are designed to glide across your skin. This provides a great shave without razor bumps and irritation that multi-blade cartridge razors can cause.
One thing you have to remember with a safety razor is that you must change the blades frequently enough to keep them sharp. Many people overuse throwaway cartridge razors by bearing down harder on the skin, but that will not work with safety razors.
The next step is to determine which direction your hairs are growing. When you have a slight outgrowth or five o’clock shadow, run your hand across your face to note this growth direction. You need to do this for all areas of your face like your cheeks, jawline, under your nose, chin and neck, as hair does not grow in one direction throughout your entire face. Mentally “map” your growth in your mind, so you know the pattern when shaving cream is covering your skin. Eventually, this mapping will become second nature to you and you will not have to think about it each time you are shaving with the grain.
Taylor of Old Bond Street
To start shaving with the grain, first use warm water to wash your face and open your pores. A nice, warm shower can be great for this. Apply pre-shave oil, gel or lotion to moisturize and protect your skin while softening facial hair.
Apply shaving cream to your face, preferably using a badger hair brush. Then, with your hair growth map in mind, gently glide the safety razor over your skin. Rinse the razor or flip to the other side for a second pass on each pathway through the shaving cream. Remember to go slowly when shaving with the grain and not bear down. When your shave is completed, use a quality after shave lotion to protect and moisturize your skin.
Remember that if you want to obtain the closest shave and don’t want to shave often, going against the grain might be the best way for you to go. However, this is not recommended for those with sensitive skin because it will produce results that could irritate and cut your skin.